It seems that the ONLY way you can add the Search Service to SharePoint Foundation 2013 is by using the SharePoint Configuration Wizard like so (you can’t even do it with PowerShell! ):

Visit the SharePoint Central administration site and select Configuration Wizards from the Quick Launch Menu on the left hand side.

Press the Start the Wizard button.

Select the account you wish to use for this service. It is always better to have one already created than try and create a new one on the fly here.
Scroll down for more options.

If you want just the Search Service Application then uncheck everything else and press the Next button.

SharePoint will bring out the traffic cones briefly while the service is configured.

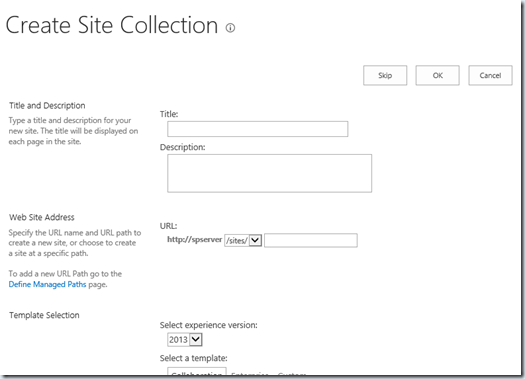
You’ll then be asked to create a Site Collection, but since one has normally be created previously during the manual creation of SharePoint Foundation 2013, press the Skip button.

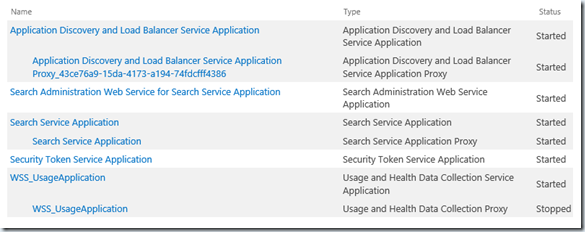
You should now see in the summary page that a Search Service Application has been configured. Interestingly, you’ll note that the following additional service have also been configured (even though they were unselected!):
- Usage and Health Data Collection Service Application
If you press the Finish button and have then have a look at the Service Applications you should see:

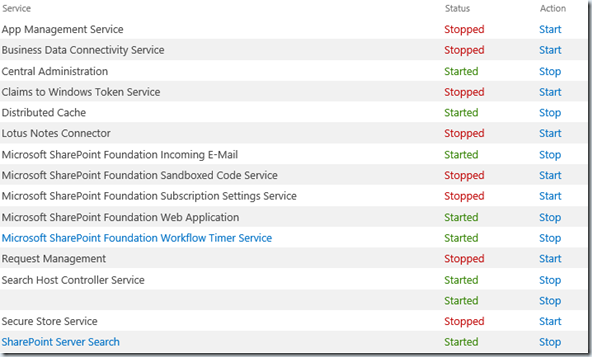
Then if you have a look at Services on Server you’ll see:

Where you should now see that the SharePoint Server Search (at the bottom of the screen shot above) is now Started!
All credits to the blog post here


