I didn't find a better solution for me so I modified the ootb calender a little bit. Here the steps if anyone want's to take a look into it:
If you don't have a calendar already, click on the cogwheel, site contents and then add an app.
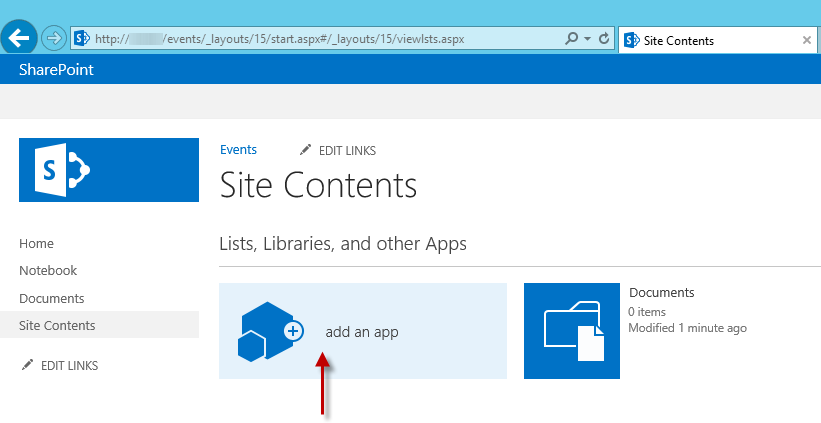
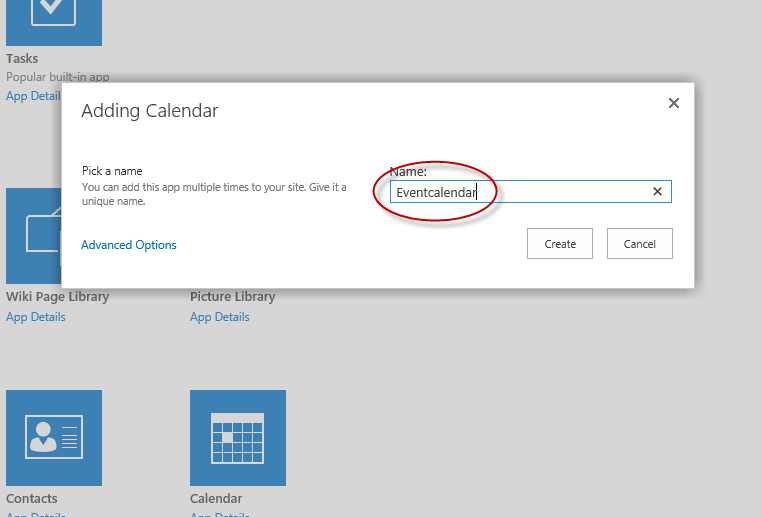
- Add a Calendar and give it a name. In this guide I took the name "Eventcalendar".
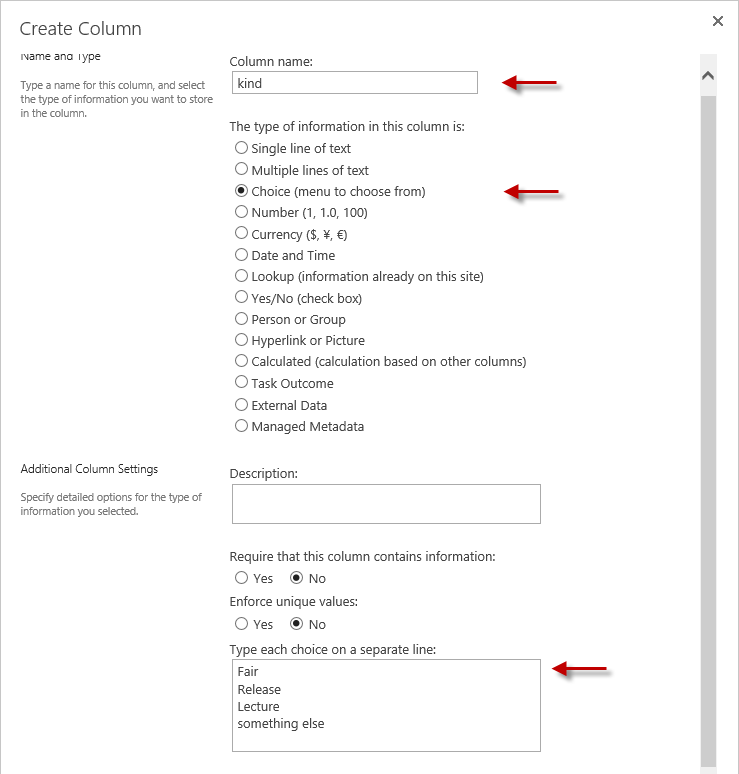
- Add a new column. You can do that in two different ways. Click on List Settings and then Create Column or directly like in the picure below:
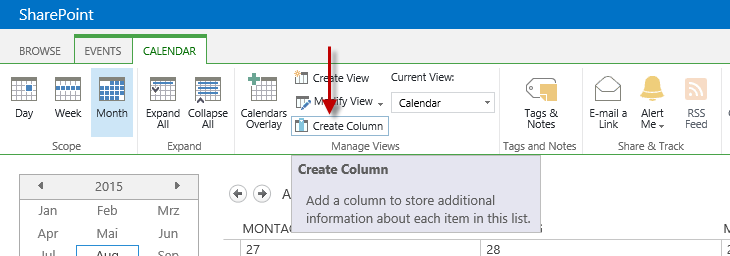
- This column will show the icon and the category of the events.
In my case the name is "kind" and the choice values are: Fair, Release, Lecture and something else.
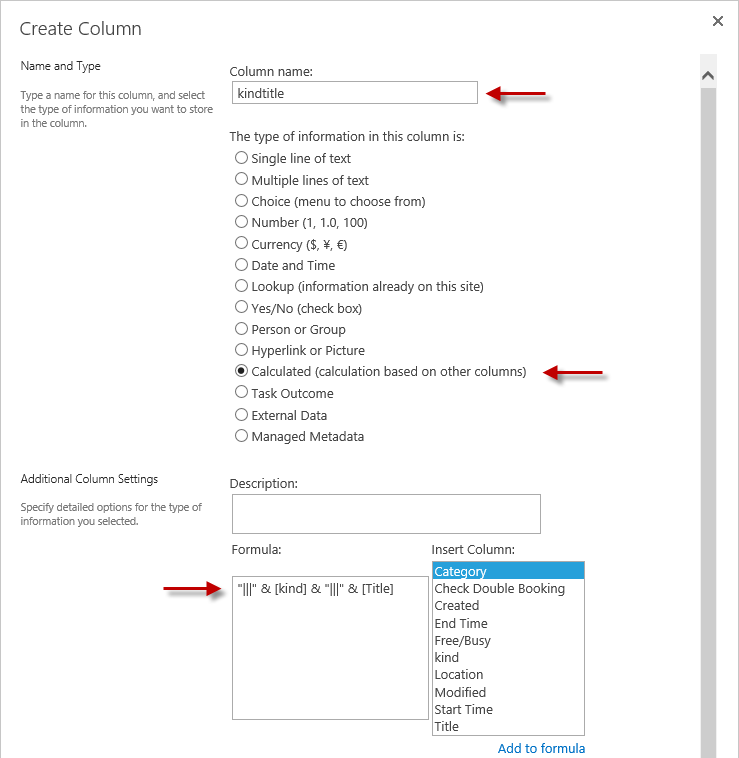
Add another column with the name "kindtitle" and type "calculated" like in the next picure. The column will help to find the right items and change the background color.
The formular is:
= “|||” & [kind] & “|||” & [Title]
Be careful if you copy the above formular that the apostrophes are correct.
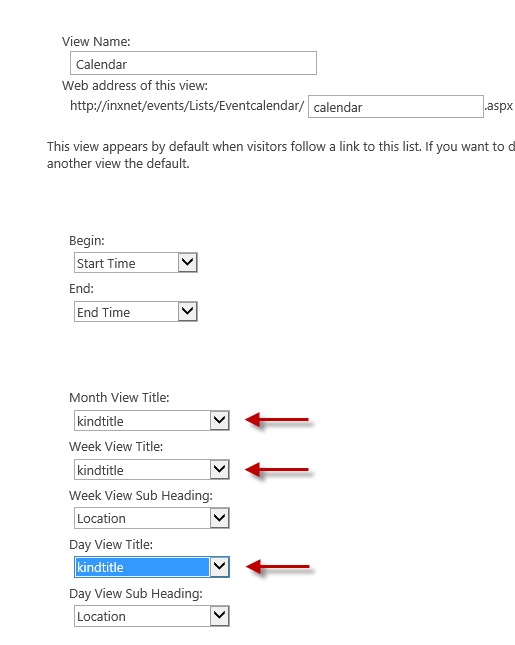
- Now create or edit the view of your calendar and change the month, week and dayview's title to the newly created column (kindtitle). I used the default view.
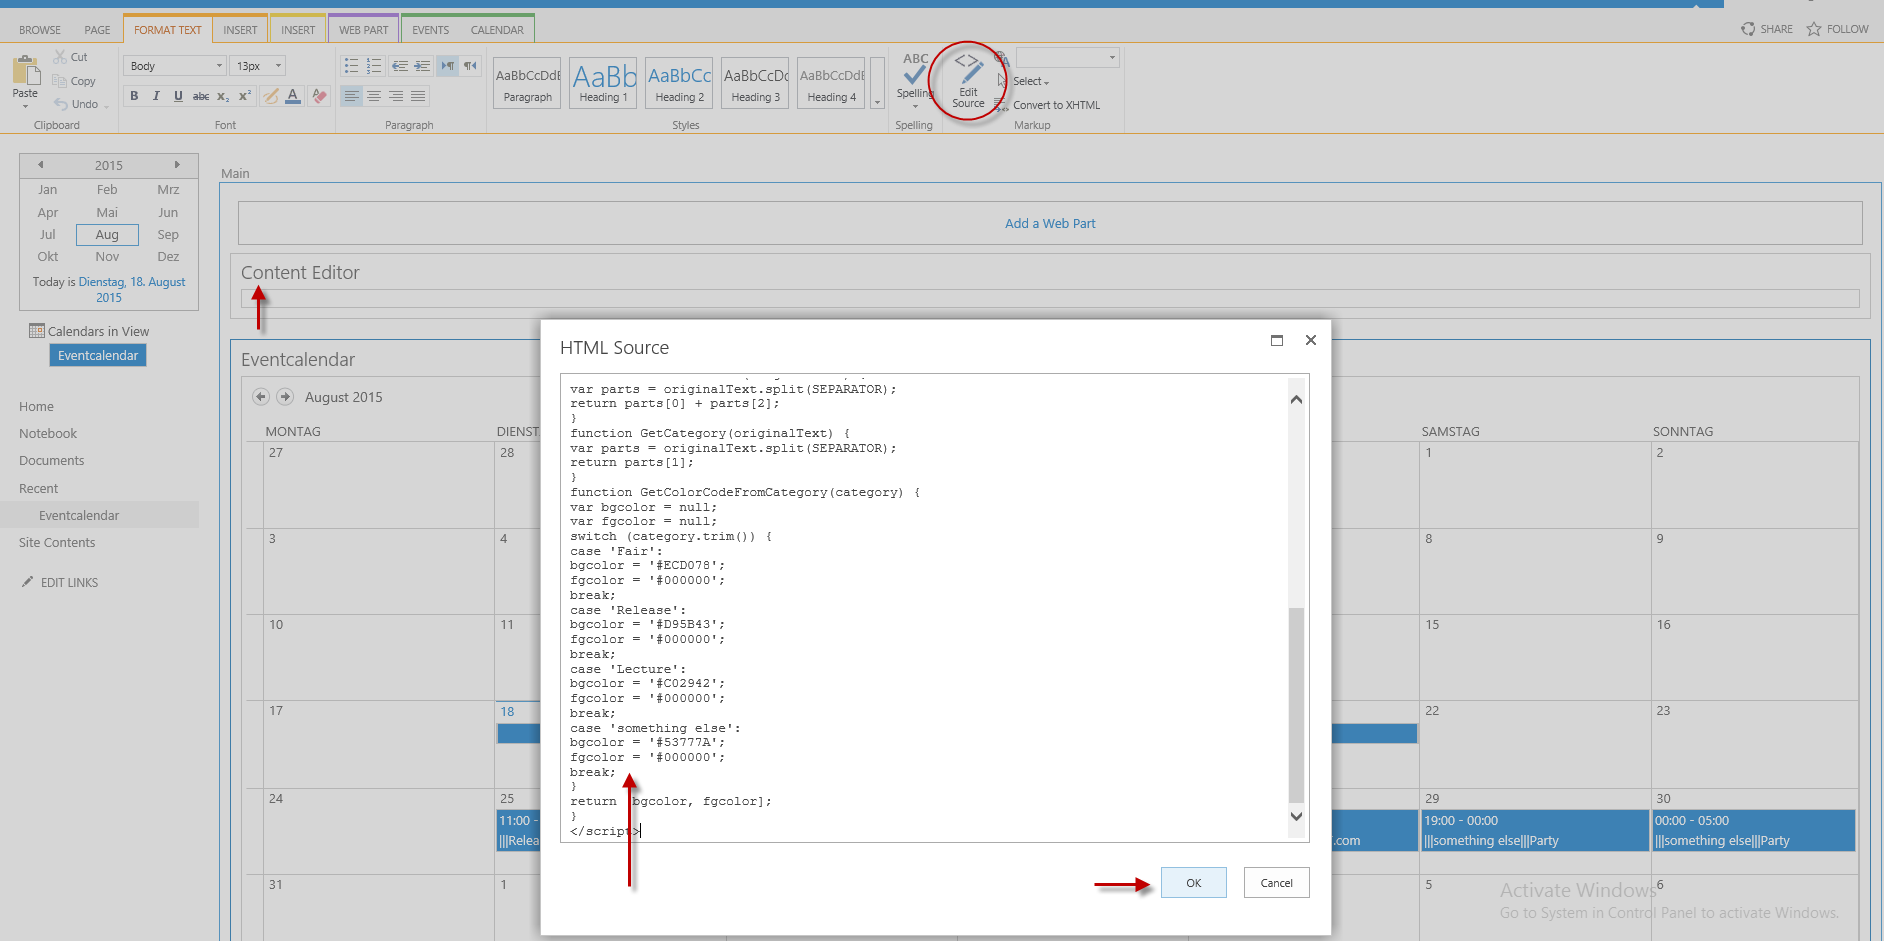
- Edit the site and add a content editor. As you maybe have already seen, the title in the events has now changed.

- Add the following script into the content editor. Click on "Click here to add new content", then "Edit Source" and then paste the script and save everything.
If you have different choice options you have to change them in the script (Fair, Release, Lecture, something else). You can also change the colors (bgcolor = background color) and (fgcolor = text color).
<style>
 .ms-acal-item{display:none;}
 </style><script src="https://ajax.aspnetcdn.com/ajax/jQuery/jquery-1.5.1.js" type="text/javascript"></script><script type="text/javascript">
 var shouldcolortext = true;
 LoadSodByKey("SP.UI.ApplicationPages.Calendar.js", function () {
 window.setTimeout(ColorCalendar, 1000);
 });
 var SEPARATOR = "|||";
 function ColorCalendar() {
 var container = jQuery('#s4-bodyContainer');
 var query = 'a:contains('' + SEPARATOR + '')';
 if(container.find(query).length > 0)
 {
 container.find(query).each(function (i) {
 var box = jQuery(this).parents('div[title]');
 var colors = GetColorCodeFromCategory(GetCategory(this.innerHTML));
 var anchor = jQuery(this);
 anchor.text(GetActualText(anchor.text()))
 box.attr("title", GetActualText(box.attr("title")));
 box.css('background-color', colors[0]);
 box.css('display', 'block');
 if(shouldcolortext )
 {
 box.find('div, a').css("cssText", "color: " + colors[1] + " !important;");
 }
 });
 }
 window.setTimeout(ColorCalendar, 2000);
 }
 function GetActualText(originalText) {
 var parts = originalText.split(SEPARATOR);
 return parts[0] + parts[2];
 }
 function GetCategory(originalText) {
 var parts = originalText.split(SEPARATOR);
 return parts[1];
 }
 function GetColorCodeFromCategory(category) {
 var bgcolor = null;
 var fgcolor = null;
 switch (category.trim()) {
 case 'Fair':
 bgcolor = '#ECD078';
 fgcolor = '#000000';
 break;
 case 'Release':
 bgcolor = '#D95B43';
 fgcolor = '#000000';
 break;
 case 'Lecture':
 bgcolor = '#C02942';
 fgcolor = '#000000';
 break;
 case 'something else':
 bgcolor = '#53777A';
 fgcolor = '#000000';
 break;
 }
 return [bgcolor, fgcolor];
 }
 </script>
- If you want to add the calender to a different site as a webpart, don't forget to add the Content Editor with the script.
I did that on the start page "events" and added on the right side the calendar in a different view. (Kind, Title, Start date, End date).
This list will give the user an overview in a list style but instead of the text you can display icons.
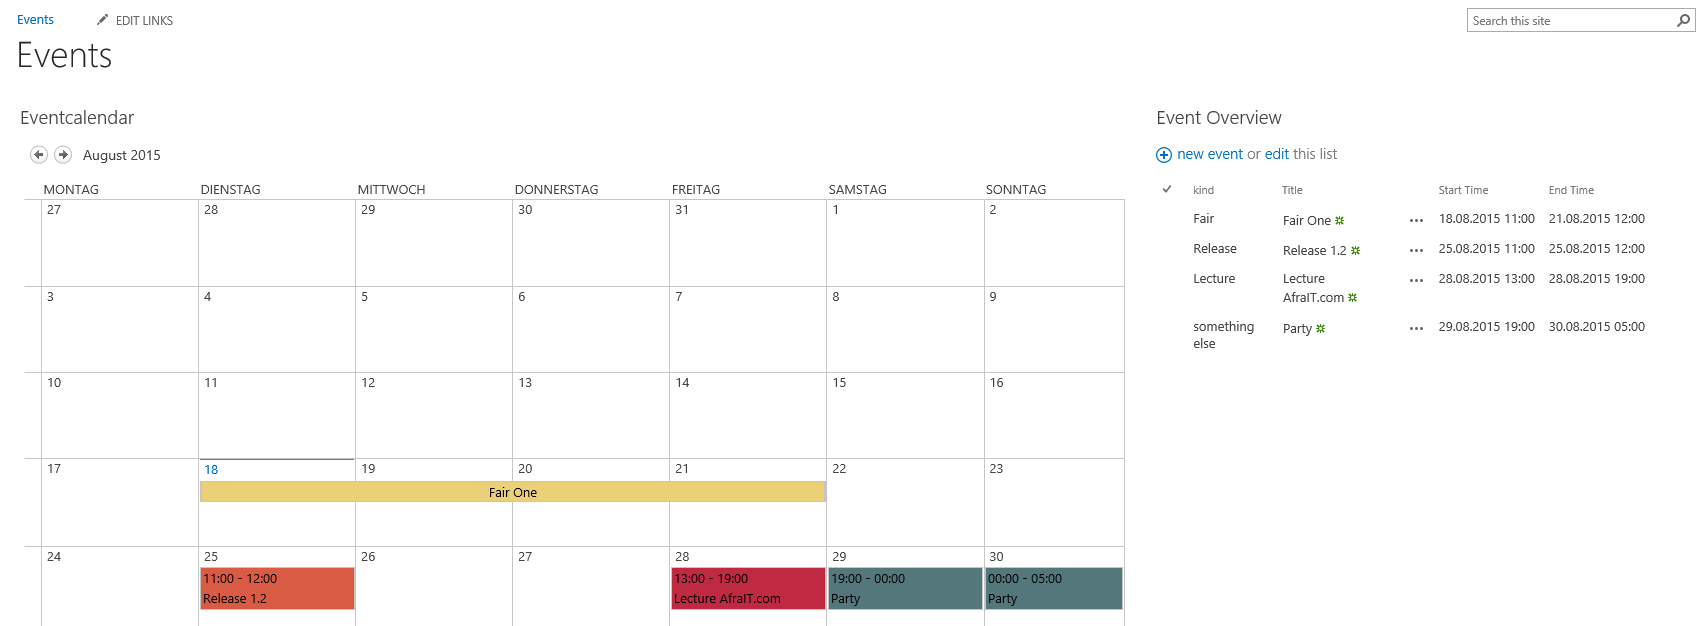
Save the following script and add it to your "Event overview listview".
As always, please double check the values of your own environmet. (Fair, Release, Lecture, something else) and of course the image source.
<script>
// created by Patrick - don't be afraIT.com
(function () {
var kategorieFieldCtx = {};
kategorieFieldCtx.Templates = {};
kategorieFieldCtx.Templates.Fields = {
"kind": {
"View": KategorieViewTemplate
}
};
SPClientTemplates.TemplateManager.RegisterTemplateOverrides(
kategorieFieldCtx
);
})();
function KategorieViewTemplate(ctx) {
var _kategorie = ctx.CurrentItem.kind;
if (_kategorie == 'Release')
{
return "<img src='http://sp13/events/SiteAssets/release_16.png'/>";
}
if (_kategorie == 'Fair')
{
return "<img src='http://sp13/events/SiteAssets/messe_16.png'/>";
}
if (_kategorie == 'Lecture')
{
return "<img src='http://sp13/events/SiteAssets/vortrag_16.png'/>";
}
else
{
return "<img src='http://sp13/events/SiteAssets/etwasAnderes_16.png'/>";
}
}
</script>
After that the start page should look similar to mine:
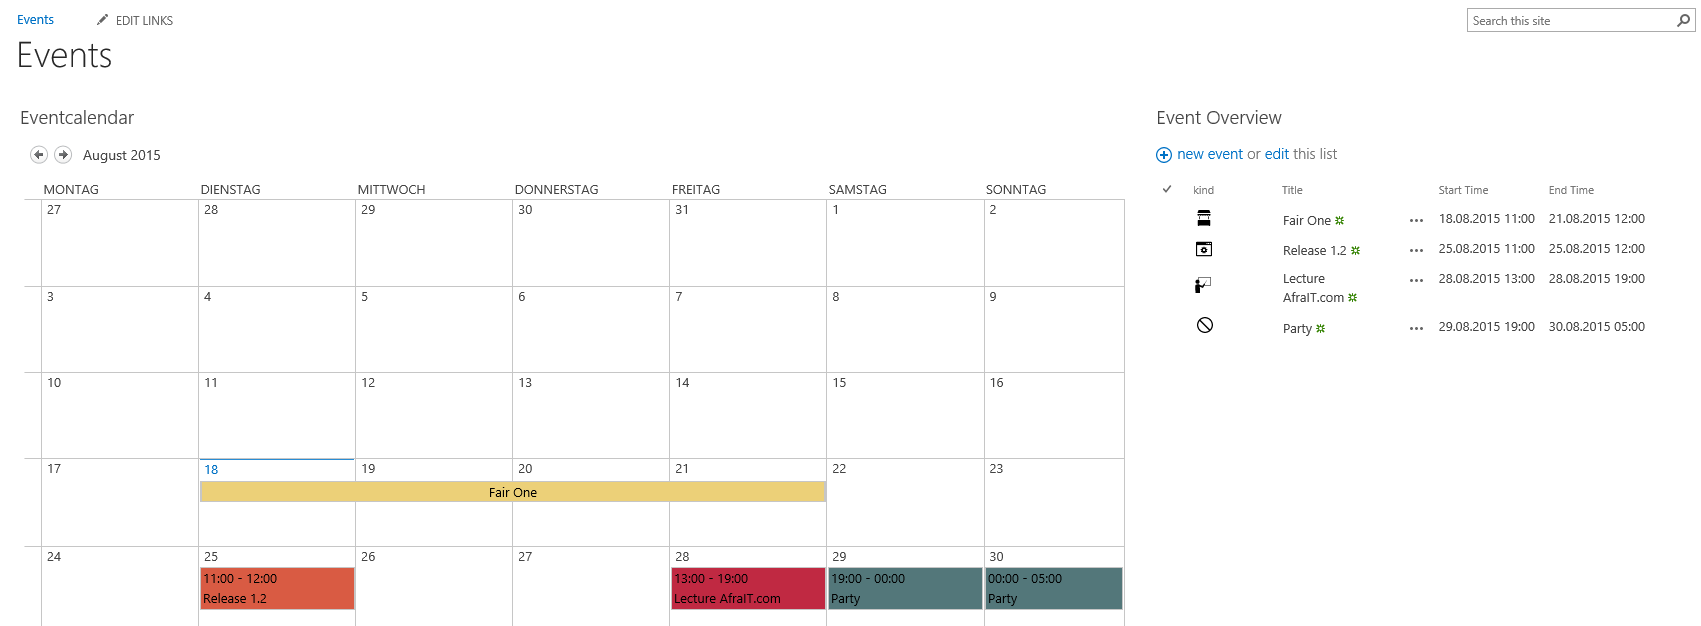
If you want to get the pictures you can check my blog post with the links to them or see the german version here.
