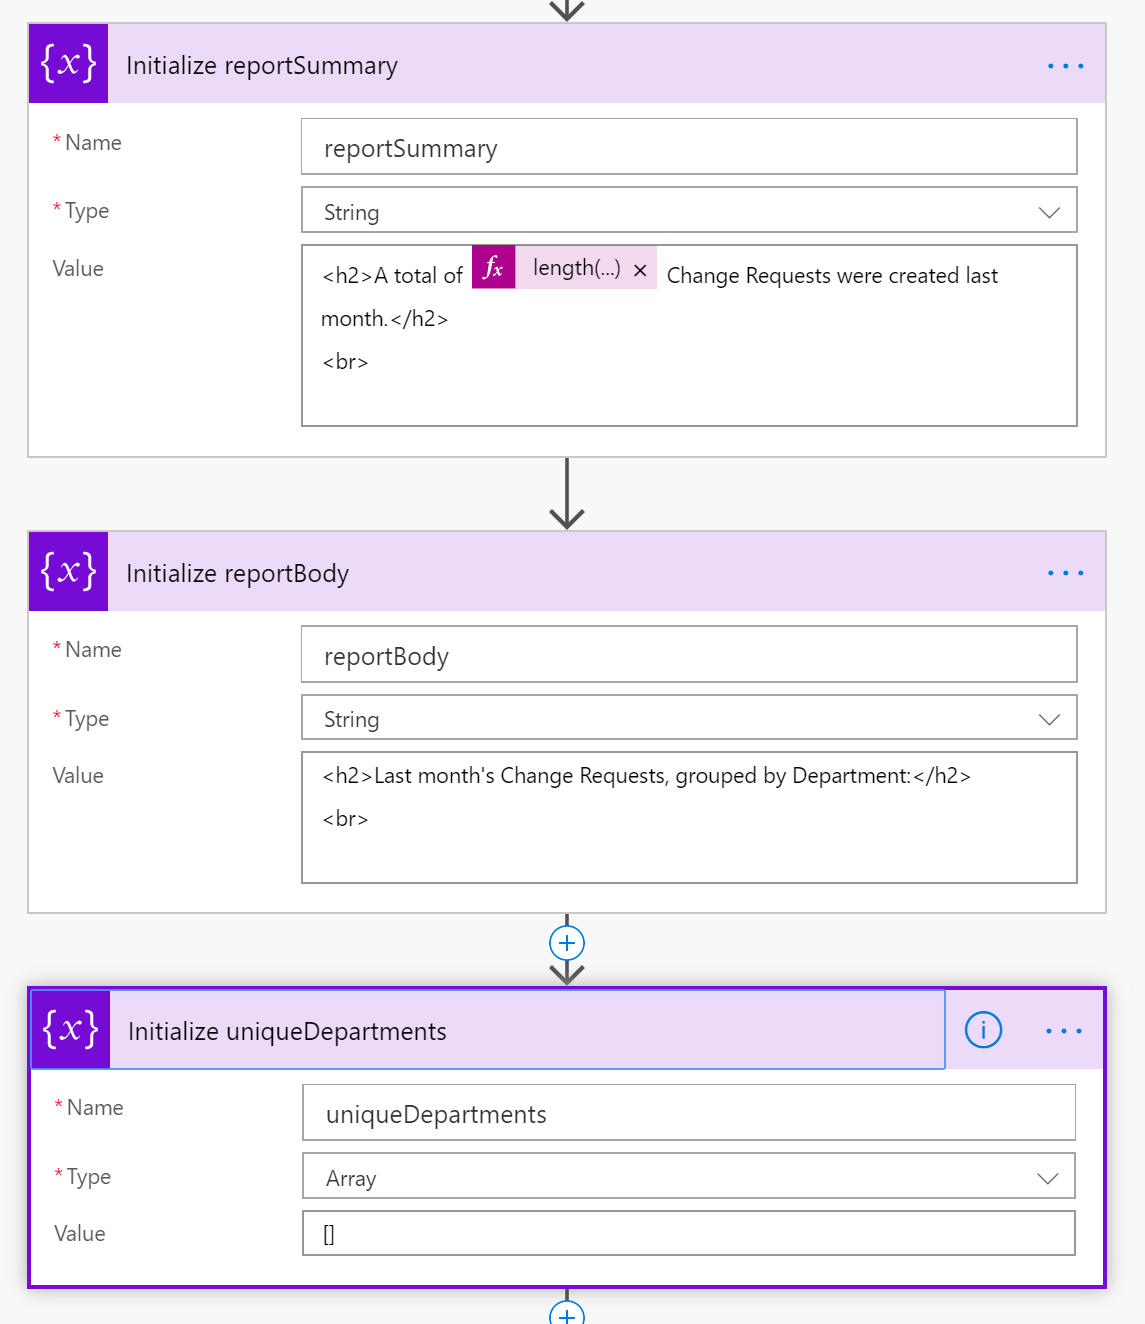
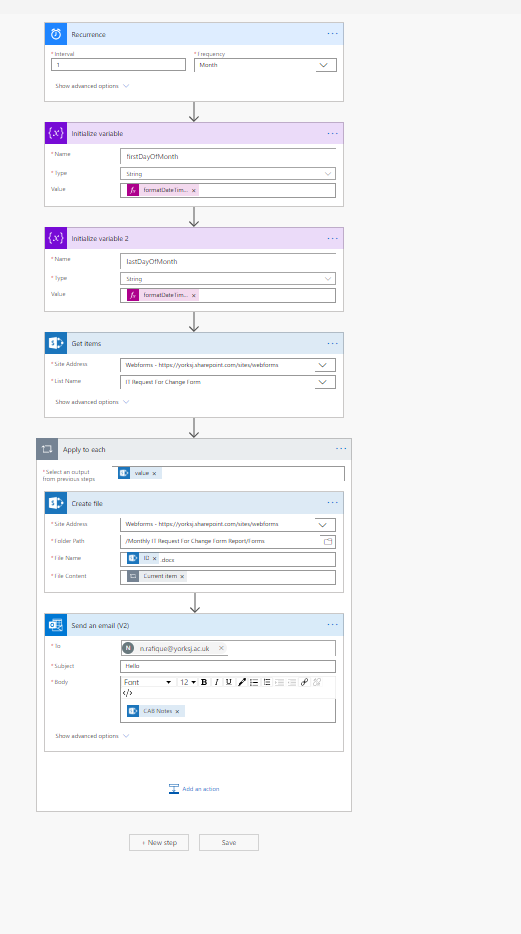
I don't have your exact schema, but for purposes of a prototype, I created a custom List named ChangeRequests from which the information will be gathered, and a Document Library named ChangeReports to which the generated report will be saved.
Below are the steps and screenshots of the basic Power Automate steps you will need in your Flow to generate your report. Please note that I did not rigorously test every step since I have no data but what I mocked in my end for prototyping, but hopefully this is more than enough to get you pointed in the right direction.
First, your scheduled trigger looks like it should work just fine.
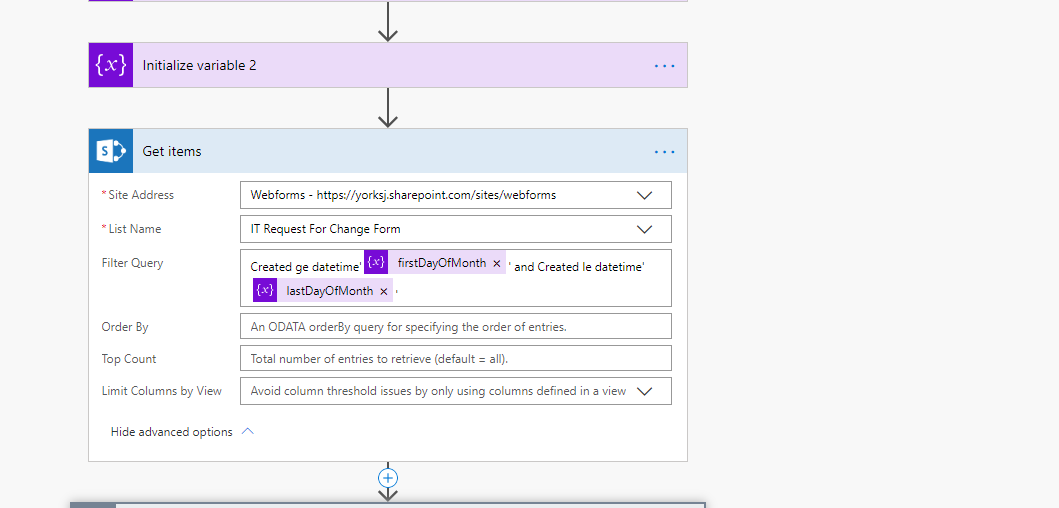
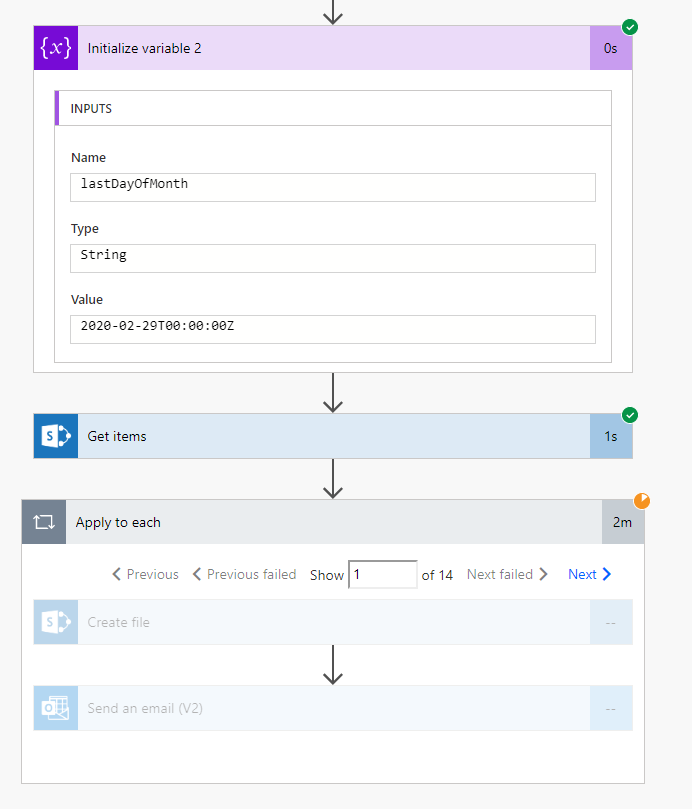
Next though, your date filters are likely going to always miss the items entered on the last day of the month. You are currently filtering where Created is less than or equal to last day of the month -- but note that SharePoint's datetime value contains the time as well as day, so anything created past 12:01 am will be greater than the date without an appended time. The way to work around this is to filter where less than the first day of the next month. I also set my start date to be the first day of the previous month -- we don't want to run the report for the current month because the current month is not over yet. If you run this report on the first or second day of the month, you'd want to grab "last month's" data.
Set firstDayOfMonth equal to startOfMonth(addToTime(utcNow(), -1, 'Month'))
Set firstDayOfNextMonth equal to addToTime(variables('firstDayOfMonth'), 1, 'Month')
Then you can get the items from your ChangeRequests list based on those dates:
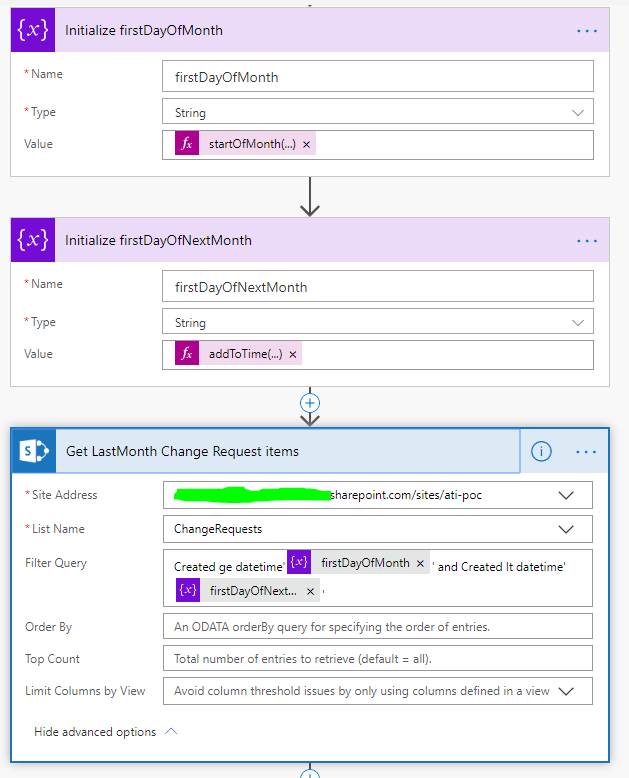
Now that you have the items that were created last month, your next goal is to generate a report of that data grouped by the Department of the creator. I have assumed for my prototype that you would use the built in Author-Department value, but you could easily substitute your own custom metadata field.
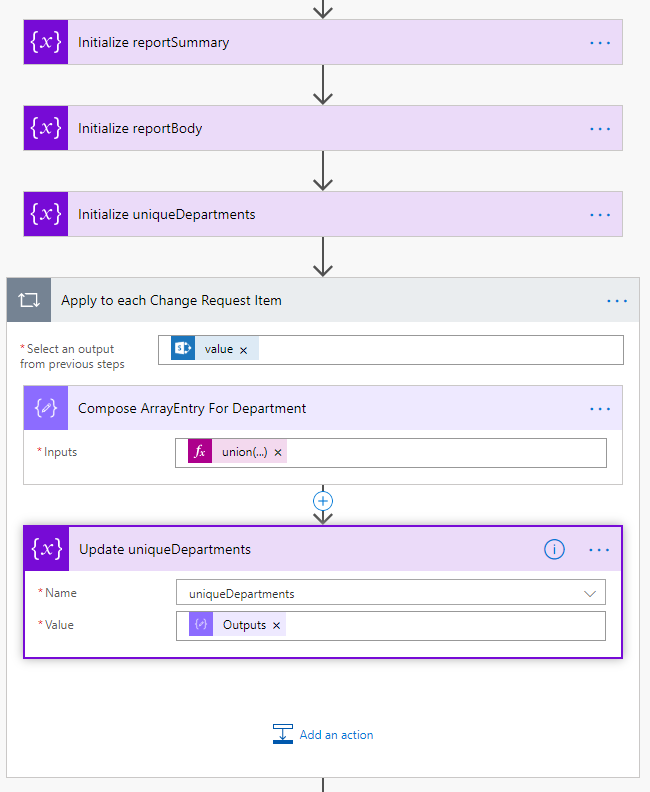
To group the data, I recommend you use the technique described by John Liu to use two "Apply to Each" loops.
The first loop iterates each item from your results to get a unique list of departments. Following his pattern, you Compose a new entry for your array of Departments by union-ing the departments array variable with a generated entry for the current item's department: union(variables('uniqueDepartments'), createArray(items('Apply_to_each_Change_Request_Item')?['Author']?['Department'])), Then you set the Array to that composed value. It may seem like it would be more efficient to use a Condition block and check whether the current item's Department is already in the Array, and if not, then Append it to the array, but due to how Flow performs comparisons against dynamic values, the Union approach is faster, and actually easier to debug and maintain.
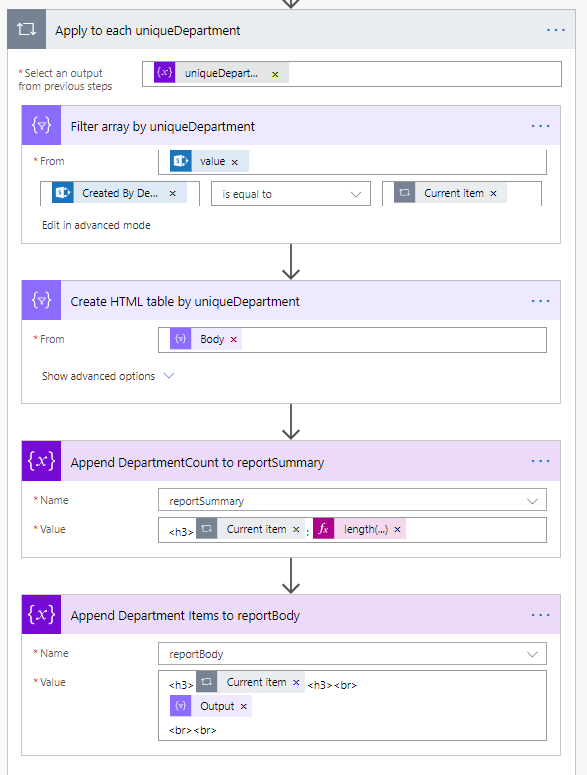
Following the Same pattern, the Second Loop iterates through your array of unique departments and filters the original results array to just get the Change Request Items for that department, then you can append the appropriate text to your report variables based on that filtered data. In my case, I am keeping separate variables for the report summary and report body and am appending the counts for each department to the summary, but appending an html table of that department's items to the body.
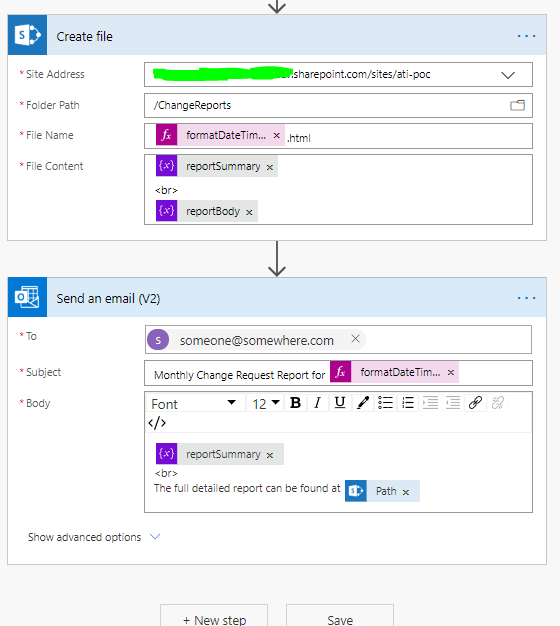
An then finally, once all loops are completed and text composed, you can use Create file to save the report in a library, and send Send an email to notify the right people about the report. Note that if you want to create an Office document instead of something text-based like .html or .txt, you have to use a Premium license for Power Automate. To specify a filename and a subject for the email I use the formatDateTime expression to generate the year and month name: formatDateTime(variables('firstDayOfMonth'), 'mmmm').
A big caveat about using Apply to each loops in Power Automate -- if you have ever used a For each loop in most development languages, there is one big difference here. In Power Automate, by default the Apply to each loop runs many items at once in parallel. Most languages run the For each sequentially, processing each item at a time. You can change the settings of the Apply to each loop to perform that way to, but the default settings are much faster because of the number of processing threads available in the cloud. But you have to account for that inside your loop. Notice in a couple of places we append or modify a variable inside our loop, but we don't turn around and try to read from that variable because multiple threads may be modifying it at the same time, and its value may not be what we expect. We can safely read and use the values from Compose actions because those are encapsulated within each thread. Other variables we need to wait until the loop is finished to utilize the final result.
Per comment below, here is the expanded early steps to initialize report variables"
